


I’ve come to believe that in the homesteading world, every garden has its experiments, and my adventure with the Colette pear variety is surely one of those. Starting off with a bare-root tree wasn’t as successful as I hoped; planting it in our crisp fall season and watching it seem to teeter on the edge of thriving and dormancy was a real lesson in patience. Like many things, growing at high altitudes requires a good dose of perseverance. Although my initial attempt with this frost-hardy, everbearing tree wasn’t an immediate success, I’m certainly not giving up on its potential for continuous harvests and delightful flavors.
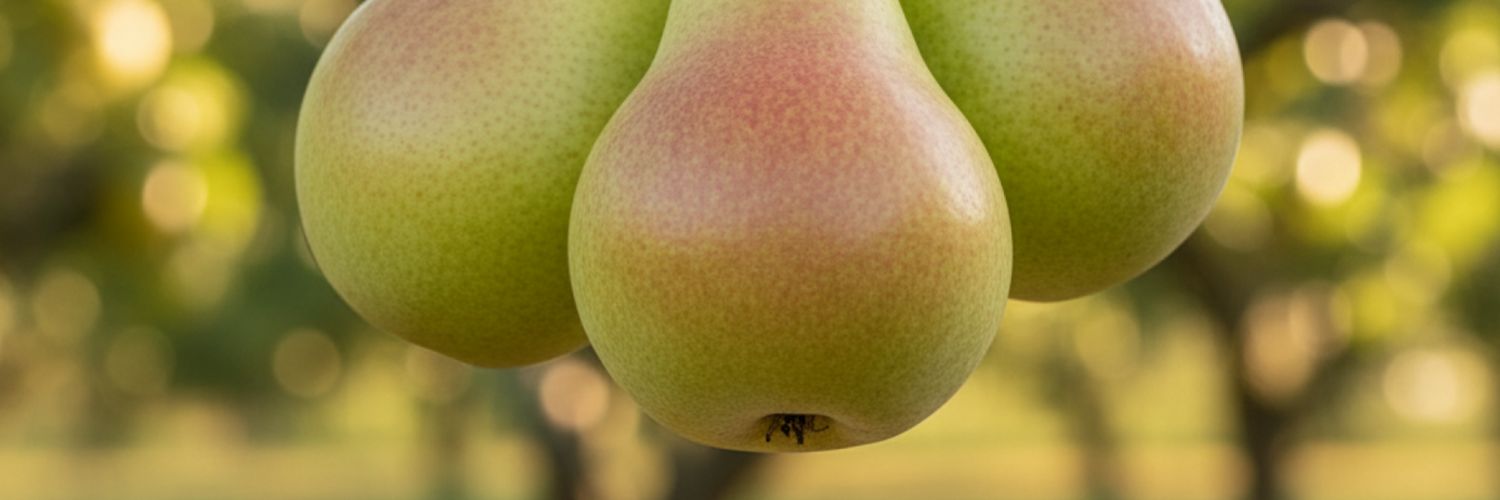
Pear: Colette – Continuous Harvests and Exceptional Flavor from a Frost-Hardy Everbearing Tree
General Information
Plant Type
The Colette pear variety is an everbearing tree, which essentially means it can continually produce fruit throughout the growing season. This is a great feature for anyone who wants to enjoy pears over a longer period of time rather than all at once.
Plant Size
When fully grown, the Colette pear tree can reach an average height of about 12 to 15 feet, with a comparable spread. This is manageable for most homesteads and doesn’t require an excessive amount of space.
Soil
Like many fruit trees, Colette pears prefer well-drained soil with a neutral pH range of around 6.0 to 7.0. I find mixing in a bit of compost or well-rotted manure can do wonders for improving soil structure and fertility.
Companions
Good companion plants for pear trees include clover, comfrey, and a variety of aromatic herbs like chives and mint, which can help in pest control and soil enrichment.
Days to Harvest
From the time of planting, expect about three years to start seeing your first real harvests from a pear tree, though this can vary depending on local conditions and care provided. Once established, it pays off with continuous fruiting.
Getting Started
One crucial aspect of planting your Colette pear is timing and preparation. In high-altitude areas like Northern New Mexico, it’s best to plant after the last frost date in spring. Begin by selecting a sunny spot that is sheltered from harsh winds—pears love the sun but not the cold blasts. Dig a hole twice the size of the root ball and mix existing soil with organic matter to improve drainage and nutrient content.
Try to plant in well-prepared soil and ensure it’s firmed down properly. Once planted, water thoroughly to settle any air pockets around the roots. Mulching around the base will help retain moisture and deter weeds, which are pesky competitors for nutrients.
Plant Care
Fertilizer
For the first couple of years, a balanced slow-release fertilizer in early spring can be beneficial. Look for signs of yellowing leaves, which indicate nutrient deficiency. Be cautious not to over-fertilize, as this can lead to excessive leafy growth rather than fruit production.
Watering
Water deeply once or twice a week until established. Infrequent but deep watering encourages deeper root growth, which is especially beneficial in regions with sporadic rain. Watch for wilting leaves, indicating too little water, or soggy soil, signaling too much.
Sunlight
Your Colette pear tree will thrive with full sun exposure—six to eight hours per day is ideal. If you notice leaves developing brown edges, it may signal too much direct sunlight or heat stress, so consider adding a protective cover during particularly hot spells.
Harvesting
Timing
Pears should be harvested when they reach full size but are still firm. Taste-testing one or two beforehand will guide you to the right harvest window. Fruits ready to pick usually detach easily when tilted horizontally.
Time
The best time of day to harvest is in the morning when the fruit is cool and the sugars are most concentrated. This simple practice helps maintain the quality and taste of the pears.
Harvest
Use a gentle twist-and-pull technique to avoid damaging the fruit or branches. Be sure to support each pear from underneath as you pick it to prevent knocking others off inadvertently.
Collection
A sturdy orchard ladder and a small harvesting bag or basket lined with a soft cloth are ideal tools to avoid bruising the fruit.
Processing
Post-harvest, pears can be gently rinsed under cool water to remove any dust or debris. Allow them to air-dry before storage. Avoid stacking them to prevent bruising.
Storage
You have a few options when it comes to storing pears:
- Refrigeration: Fresh pears keep well for about a week in the fruit drawer. Wrap them individually in newspaper to extend their shelf life.
- Canning: Preserve your pears in light syrup or their own juices. This can keep them safe and delicious for several months.
- Freezing: Slice, blanch, and then freeze the pears for future use in cooking.
For each method, remember to label your storage containers with the date to ensure you use them within the best time frame.
Uses
Food
Pears are versatile and can be enjoyed fresh, baked in desserts, or even added to savory dishes for a touch of sweetness. A favorite is a warm pear compote, delightful over pancakes or ice cream.
Medicinal
While not commonly used medicinally, pears do boast natural fibers and vitamins which are great for digestive health. The fruit can be a part of a balanced diet aiding hydration and nutritional intake.
My journey with the Colette pear tree might have started on a rocky note, but that just adds another layer of excitement to the homesteading adventure. Whether it’s transforming the garden with new experiments or awaiting the day you bite into the first homegrown pear, there’s a certain satisfaction in learning and growing along with your plants. I encourage you to take this step, and possibly a few others along the way, as you build your own fruitful garden at any altitude.
Where To Buy
Full Transparency
NOTE: This article is produced through a hybrid process of both personal experience and AI generated content. All plant varieties listed are actual crops and varieties grown on my property along with my personal experiences. Plant facts and information are AI generated to provide expanded information and context (plant size, soil, etc). AI can make mistakes and it is best to verify information before applying it.