


Kale has been one of those crops that has stood out in our garden, both in its resilience and its nutritional offerings. There’s something wonderfully rewarding about growing your own food, and kale, particularly the Curly Blue variety, fits perfectly into a homesteader’s aim for self-sufficiency. When it comes to feeding your family with fresh produce, this kale variety is a powerful ally.
The flavor of kale from your garden is far superior to store-bought options, with a richer, more fulfilling taste. It thrives here in Northern New Mexico, especially with the cooler growing seasons typical of high altitudes. I’ve found that planting kale in partial shade stretches the growing season well into summer, allowing us to enjoy these vibrant greens longer.
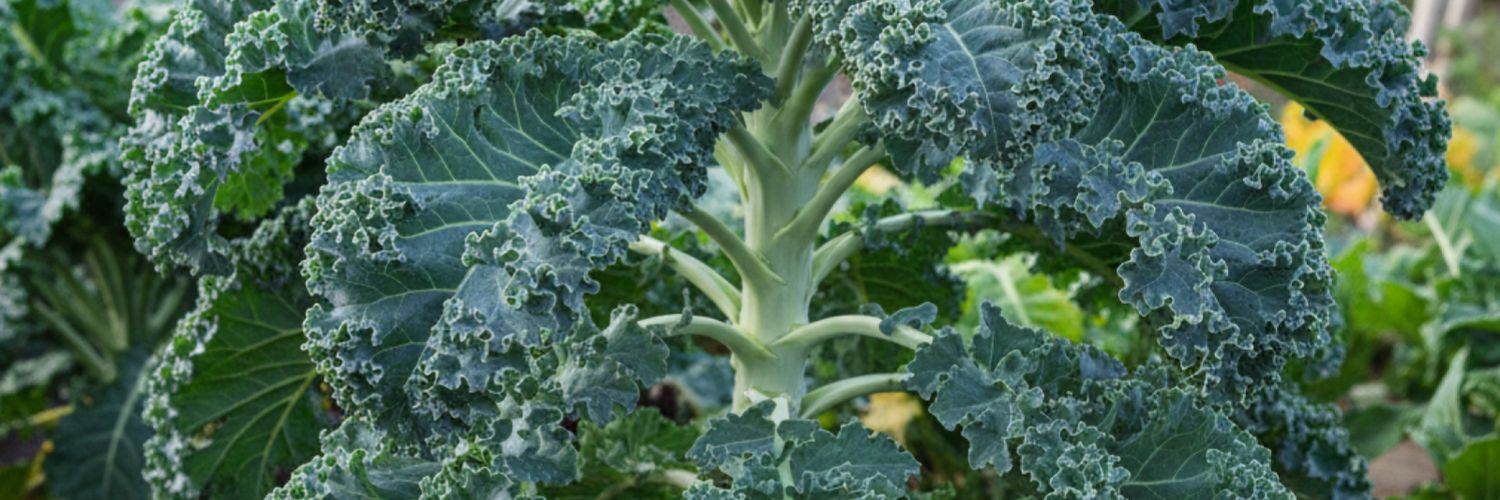
Kale: Curly Blue – Cold-Hardy, Nutrient-Dense, and Vibrant Greens for Your Garden
General Information
Plant Type
Kale is a leafy green vegetable and an absolute must in any high-altitude homestead garden. It’s a biennial but generally grown as an annual. With its lush, curly leaves, it’s considered both a source of delicious greens and a visual addition to your garden.
Plant Size
The Curly Blue variety of kale can grow up to 1 to 2 feet tall and about the same width. Its voluptuous leaves can be enjoyed throughout the season, providing continuous harvests.
Soil
Kale prefers well-drained, fertile soil with a slightly acidic to neutral pH, around 6.0 to 7.0. If your soil isn’t quite up to par, don’t fret—adding compost or well-rotted manure before planting will help improve it.
Companions
Some good companions for kale include onions, garlic, and beets. They help keep pests away and improve growing conditions, maximizing your gardening success.
Days to Harvest
You’ll find that kale takes about 55 to 75 days to be ready for its first harvest, depending on environmental conditions. For me, this usually coincides with mid to late summer.
Getting Started
Growing Curly Blue kale isn’t complicated, even if you’re a beginner. Start by choosing the right spot. Since kale likes cool weather, aim for a location with partial shade. I typically start my seeds indoors about six weeks before the last frost date, which allows me to get a jump start on our shorter growing season.
After your seedlings grow sturdy enough, transplant them outdoors. Space them about 12 to 18 inches apart to give each plant enough room to flourish. If you’re direct-seeding, which is also a fantastic option, sow seeds about half an inch deep and cover lightly with soil. Be sure the soil stays moist during germination.
Plant Care
Caring for kale is straightforward but does require consistency.
Fertilizer
When it comes to fertilizing, a balanced approach is best. Use a slow-release granular fertilizer at planting time to give your young kale the nutrients it needs. As the plants grow, a bi-weekly feeding with compost tea or a seaweed-based solution can promote lushness. Be cautious though—yellowing leaves might hint at nutrient deficiencies, while excessive growth but limp leaves could mean too much nitrogen.
Watering
Kale needs consistent moisture. Aim for about 1.5 inches of water per week, either from rainfall or supplemental watering. If the leaves begin to wilt or become crispy, it’s a sign they’re too dry. Conversely, soggy roots could signify overwatering, which you’ll want to avoid as well.
Sunlight
Curly Blue kale enjoys full sun, but given our high-altitude, intense sunlight, some afternoon shade can be beneficial. Watch for yellowing or scorched leaves as a sign that the plant may be getting too much sun. Shade cloth can be handy in the peak of summer.
Harvesting
Timing
Kale is most delicious when harvested young and tender, but it’s equally nourishing as it matures. I typically start harvesting when the leaves are about the size of my hand.
Time
Morning is the best time to pick your kale. The cool morning temperatures are when the leaves hold onto their flavor and nutrients the most effectively.
Harvest
To harvest, simply snip or pinch off the outer leaves, leaving the central leaves for continuous growth. Be on the lookout for any signs of pests at this time, as kale can attract aphids and other insects.
Collection
For collection, my trusted old garden scissors work wonders. Their precision ensures I don’t damage any remaining parts of the plant as I snip the leaves.
Processing
Once harvested, washing your kale is a must. I rinse mine under slow running water to remove any dirt or pests. For a deeper clean, soak the leaves in a solution made of water and a touch of vinegar before a final rinse.
Storage
Kale can be stored in several ways:
- Refrigeration: Place your clean, dry leaves in a reusable produce bag and store in the refrigerator. Kale usually keeps fresh for about a week this way.
- Freezing: If you find yourself with a bountiful harvest, blanch the leaves first, then place them in freezer bags for extended storage. They’ll hold up several months for those times when fresh greens are scarce.
Uses
Food
Kale is a culinary delight. Whether used in salads, soups, or simply sautéed with a bit of garlic and olive oil, it’s a staple in many dishes here at the homestead. It packs a powerful nutritional punch, being rich in vitamins A, C, and K.
Medicinal
Known for its health benefits, kale is more than just a tasty green. It’s an excellent source of antioxidants and supports overall health, particularly boosting the immune system and encouraging heart health. While we love using it in our meals, it’s the nutritional benefits that make it an invaluable garden resource.
Growing Curly Blue kale at high altitudes feeds into a self-sufficient lifestyle, complementing a prepper’s mindset seamlessly. With a bit of effort, this nutrient-dense green will become a cherished part of your homestead garden, providing sustenance and the satisfaction of growing your own food.
Where To Buy
Full Transparency
NOTE: This article is produced through a hybrid process of both personal experience and AI generated content. All plant varieties listed are actual crops and varieties grown on my property along with my personal experiences. Plant facts and information are AI generated to provide expanded information and context (plant size, soil, etc). AI can make mistakes and it is best to verify information before applying it.